No first-aid kit is complete without a medicinal salve. A salve is an ointment used topically (externally) that helps to heal and protect our skin. It is a natural herbal remedy that is easy to make and can be used for a variety of skin troubles — from sunburns to bee stings to eczema and beyond!
What is a Salve?
A salve is different than a cream, lotion, or balm in that it contains no water or butters (such as cocoa or shea butter); instead, it is made from a combination of oil or lard and wax with an added herbal preparation or essential oil. The thick waxiness of beeswax or vegetable wax helps to protect our skin as well as to soothe and nourish it, and the oil acts as a carrier for the herbal properties we want.
Making a salve is also a great way to introduce herbalism and botany to kids. It is an activity the whole family can participate in!
Herbal Salve Ingredients
1 cup Herbal oil **included in directions
1/4 cup beeswax
vitamin E (acts as a preservative)
Essential oils
Herbs and plants such as: dried Calendula, dried Yarrow, dred lemon balm, dried St John’s Wort, dried Lavender, wilted Plantain, dried Comfrey (leaves) etc.
If you are working with fresh plants, try to harvest them during the cooler part of the day, from a clean place without pesticides, herbicides, animal waste, or pollution. Be sure they are dry. Do not rinse the plants!
Directions for Making the Salve
First, we need to make an Herbal Oil:
There are 2 methods we can use to make an Herbal Oil: a cold infusion process or a hot infusion process. A cold infusion takes much longer than a hot infusion, but it is the best for delicate materials, such as leaves and flowers. Hot infusions are the best method for tough materials, such as bark, berries, and roots.
However, both methods can be used to make a salve, especially if you do not have time to wait for a cold infusion. A hot infusion will still extract medicinal properties from the plants we are using, though not as much as a cold infusion.
*Note: if you choose to use a cold infusion process, special care is needed if you use fresh plants instead of dried. Fresh plants have a high water content, and water can turn the oil rancid or cause your salve to mold.
Method 1: Cold Infusion Herbal Oil
Take a clean, clear glass jar with lid and add clean herbs. Cover herbs with organic Olive oil (stable at high heat) and use a stir stick to push the herbs under the oil. You will want to try to get all the air bubbles out and submerge all the herbs under the oil. Herbs that are exposed to air will increase chances of the oil going rancid.
Top the jar off with the oil, no less than 1-2 inches over your herbs. If you are using dried herbs, put the lid on tightly. If you are using fresh herbs, secure the cover with a cheesecloth and a rubber band.
Label with the name (herbal oil), herbs used, and date. Place in an area where you can see it, and let it sit for 2-6 weeks. Try to shake it at least once per day, and add in new olive oil as needed so that the herbs are always submerged in oil.
Strain through a cheesecloth or jelly strainer bag into another clean jar, label, and store in a cool, dark place until needed. Shelf life should be one year if stored properly.
Method 2 : Hot Infusion Herbal Oil
Heat the oil in a double boiler or a small crock pot. Add in the herbs and make sure that the herbs are submerged under the oil. Heat for 1-5 hours on low, checking regularly to make sure that the temperature doesn’t get too hot (temperature should be at least 100 degrees to a maximum 140 degrees Fahrenheit).
Strain through a cheesecloth or jelly strainer bag into another clean jar, label, and store in a cool, dark place until needed.
Directions for the Herbal Salve Recipe:
Heat 1 cup of the herbal oil in a double boiler or small crockpot.
Add 1/4 cup beeswax (shredded/grated so it melts faster). When melted, remove from heat.
Add in vitamin E drops and Essential Oils if you wish. Mix well. For a softer salve, add in more herbal oil. For a firmer salve, melt in more beeswax.
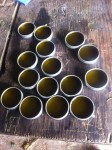
Pour into containers, and label with purpose, date, and ingredients used.
Learn how to confidently identify plants using their unique family patterns in this in-depth video by author of Botany in a Day, Thomas Elpel!
*** For educational purposes only. This information has not been evaluated by the Food and Drug Administration. This information is not intended to diagnose, treat, cure or prevent any disease. We recommend that you consult with a qualified health care practitioner before using herbal products, particularly if you are pregnant, nursing or on any medications. ***
*** Please read our Honorable Harvesting Guidelines before harvesting any plant material. The final guideline is of utmost importance: “Never put anything in your mouth unless you are 100% sure it is safe to ingest.” ***

Hannah began her apprenticeship at Wolf Camp in 2013 and graduated as a lead herbal instructor in 2014. Hannah graduated from the University of Oregon in 2014 with a Bachelor’s Degree in Foreign Languages. She has her own blog, where she writes about her love for crafts, animals, plants, cooking, and the outdoors: rainmountaincrafts.com
For in-depth learning, join our Weekly Online Classes:
- Tuesday Classes focus on Herbal Medicine & Plant Crafts in the autumn season, followed by Gardening & Cooking Wild Edible Food Plants in the spring.
- Thursday Classes focus on Wilderness Survival & Bushcraft Skills in the Autumn Season, followed by Wildlife Tracking & Birding in the spring.
- Saturday Classes for all ages guide you through the Wolf Journey Earth Conservation Course – Book One: The Neighborhood Naturalist.


