Wolf College Top 10 Lostproofing Skills
- Plan your route and risk manage it (empower all to say “stop, is it worth the risk, and if so, let’s make a mitigation plan)
- Every person needs to bring the 10 essentials. See https://www.mountaineers.org/learn/how-to/the-ten-essentials
- Always tell someone where you’re going and when you’ll be back. Then go there! If you do this, then you know someone (lots of someones) will come looking for you.
- Whenever you change your plans, stop and go back to number one.
- Never separate from your party unless there is a paramount reason and all parties go back to number one.
- Lead, don’t follow, at least in your mind, at all times.
- Halt when HHALTT (hungry, hurt, angry, lonely, tired, thirsty)
- Always have your Awareness Skills “on” including wide-angle vision, expanded hearing, and form walking (fox walk, etc.)
- Regularly look behind you so you can recognize it as the way back.
- The second you feel a twinge of feeling lost, stay where you are unless it’s dangerous, keeps you exposed to elements, is near a loud creek/river (SAR can’t hear you and you can’t hear them). If you must move, then mark the area (you are lost and need help, your direction of travel, date/time, name, etc) and move to a safe place as close by as possible.
Wolf College Top 10 Orienteering Skills (finding cardinal directions)
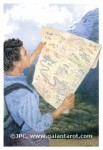
- How to Find Directions Just Using A Map With No Compass. For the Wolf College 4 step process of teaching people to read a map, you have to have a good map with contour lines, accurate landmarks, and aligned so that North is directly “up” toward the top of the page. Also be sure to be in an area that a person is familiar with, and where you can see landmarks and hills around you. (in this process, you’ll most critically be teaching a person to align a map correctly, and read contour lines in order to understand how steep an area is, how water will flow before you get to an area, how to recognize hills in the distance; as you will see, the most helpful trick is to print a “terrain” map of your area and trace over the contour lines so that your map starts to look 3D)A. Start by having a person place an “X” on the point where you are standing on the map.B. Next, compare landmarks around you to the landmarks indicated on the map, and turn the map slowly around until the most prominent landmark in the distance is oriented in the same direction on the map in comparison to the X where you are standing. Have a person hold their map directly in front of them so that they are facing North along with their map. That’s how to find North simply by using a map, by the way.C. Set the map down, still aligned correctly, and use colored pens/pencils to trace over the contour lines, starting with the most prominent ones, which on a USGS map will be the contour lines which are at 200 foot intervals. Then use a different/lighter color to trace over the fainter contour lines which are at 40 foot intervals.D. Finally, have a person walk around their stationary, north-aligned map, pointing out the landmarks in the distance as compared to the X on the map.
- Compass. For a detailed description of the special Wolf College accurate, easy-for-all-ages method of using a compass and putting compass on map, check out the blog post following this one.
- Floating Pin on Leaf (make your own magnetic north compass, but please note that despite wrong internet info, rubbing on silk/fur, etc. don’t magnetize it; it’s usually naturally magnetic iron with some chrome and nickel, but you can use a magnet)
- Shadow Tip (mark the movement of the end of a shadow with a rock (in the northern hemisphere, W will be your first mark, and after waiting a few minutes, E will be your second mark; the nearer to noon you are, the longer it takes for the shadow to move much; also this only works after 7 a.m. and before 7 p.m. otherwise it will mark a north-south line)
- Old School Watch (unless you have an old school watch, just draw a clock on paper, draw in what time it is, then lay your paper flat and point the “hour hand” at sun; half-way between the hour hand and “12” on the watch is South (in the northern hemisphere between 7 a.m. and 7 p.m., otherwise, North is half-way between the hour hand and 12.
- Sun Time (learn where the sun is at what time of day; this is the most common way naturalists get their bearings; please note daylight savings time and seasonal changes as to where the sun comes up and sets)
- Moon Time (learn Sun Time first, and then graduate to moon time when you are feeling particularly congnative:)
- Stars (learn to find the north star between the big dipper and the “w” cassiopeia, or look at the “summer triagle” which “points south.”
- GPS (see directions that come with your unit, carry extra batteries, and go back to number 1 above to learn contour lines etc. to avoid that embarrassing call to Search & Rescue saying “I’m at xyz coordinates and I have no idea where that is.”)
- Nature (all of these need to be used in combination with one another to get your bearings, but snow melts faster on south facing slopes, vegetation grows better on south facing slopes in northerly climates and better on north facing slopes in hot dry climates, mosses and certain lichens grow better on north side of trees, ants and other insects often build homes on south side of trees but all of these might depend on prevailing winds and proximity to water, various forms of weather/wind come from certain directions such as cold winds from the north etc., and finally know where high landmarks such as mountains are as compared to your general location)
Wolf College Top 10 Natural Navigation Skills (moving efficiently in nature by going in a straight line, or going the easiest route, or compensating to avoid mistakes)
- Stay Straight by Lining Up Landmarks (either keep a far-off object like a mountain on the same side of you, or choose your direction, look for the furthest landmark and add 2 additional landmarks between you and it; when you reach the first of the 3 landmarks, add another one beyond the third if you can, otherwise, add another one between you and the last one, so you always keep 2 between you and the furthest landmark so that you stay straight)
- Stay Straight by Looking to the Skies and keep clouds/stars/sun etc. in the same direction for a while.
- Stay Straight by Listening, i.e. keeping noises in the same direction for a while.
- Stay Straight by Dead Reckoning if you can compensate for your Left/Right Dominance, the changing terrain, etc. (to test for your dominance, go to a football field, mark where you start, square your shoulders directly toward an inanimate object, close your eyes and try to walk directly there, being careful of course. note whether you veered left or right. repeat in the opposite direction and note your result. repeat again perpendicularly until you realize what your dominant tendancies are. in the future, if you ever need to dead reckon, compensate.)
- Eliminate Errors by Pacing For Distance with time if you have tested your speed, or with distance by counting when you put your foot down on the same side (choose left or right). Measure 100ft and walk several times. Multiply your 100-ft pace by 52.8 (one one-hundredth of a mile). The result is the number of steps you take with one foot in a mile = your pace. Most walk about 1000 paces per mile. Pick up a pebble per 100 to help you keep track.
- Eliminate Errors by Using Check Points, which are recognizable features along route you can use to stop and check your location (ie pond, turn in road, power line crossing road) – ok to add checkpoints to your map (fence, eagle nest, etc).
- Eliminate Errors by Using A Catch Feature, such as an impossible-to-miss natural or human-made feature that lies across your route (ie road, powerline, river) that tells you you’ve gone too far and missed destination. The feature “catches you”. Best is to have 2 catch features that intersect so you can travel to intersection to re-orient.
- Eliminate Errors by Aiming Off by creating a purposeful error to one side so you know which way to turn to get to your destination (ie road is catch feature and you’re parked on road but when you hit road you don’t know whether car is left or right. So, make error to one side so you know for sure which way to turn to reach your car. That way you don’t go in the wrong direction then have to turn back.)
- Go the Easiest Route by Considering Handrails & Funnels, such keeping a stream, road, cliff, powerline or other feature off to one or both sides of you, and maybe following them to a destination if they don’t lead to dangerous points.
- Go the Easiest Route by Considering Contours, such as staying at the elevation that offers the most open terrain that’s also most protected from wind, water, noise, etc. which is usually half-way up a slope where it’s not too steep.
- Go the Easiest Route by Considering Vegetation, such as avoiding wetland plants.
Chris Chisholm is founder and co-owner of Wolf Camp & School of Natural Science. For some excellent and practical modern navigation tips, also be sure to read the quick https://www.mountaineers.org/blog/the-frugal-navigator by John Godino, Navigation Instructor with the Mazamas.
For in-depth learning, join our Weekly Online Classes:
- Tuesday Classes focus on Herbal Medicine & Plant Crafts in the autumn season, followed by Gardening & Cooking Wild Edible Food Plants in the spring.
- Thursday Classes focus on Wilderness Survival & Bushcraft Skills in the Autumn Season, followed by Wildlife Tracking & Birding in the spring.
- Saturday Classes for all ages guide you through the Wolf Journey Earth Conservation Course – Book One: The Neighborhood Naturalist.


