Arrow Making Instructions
Please note: Do not use wood arrows in compound bow. Also, investigate “spine weight” of arrow woods to ensure that the wood you are using is strong enough for your “bow weight.” You can do this in a survival situation by flexing a number of different sticks, both live (green) and dead (seasoned), or splitting/carving heartwood down to about 5/8 inches thick, and learn to sense what’s “not too stiff, not too flexible.”
- Harvest the Wood: Start with a relatively straight section of sapling or branch that is as free as possible from knots and side branches, and without any twist. Look for the most abundant species in your area, such as rose, hazelnut, dogwood, even samplings of larger trees, but as mentioned above, you’ll have to investigate which woods will end up with a satisfactory “spine weight” which can be totally different depending on many factors such as if something grew in the open, or in close competition with other trees. Hard woods like oak may have the correct spine weight when still “green” or unseasoned. Once they dry out, however, they will get really hard and may be too stiff. Instead of choosing thin branches or sapling shoots, and you have hand tools, you can instead use dead (seasoned, but not rotten) logs that are easy to split and carve to make arrows, such as many cedar family trees, and some other softwoods like species in the pine family (sitka spruce is prized, for instance).
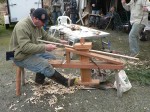
- Shape the Wood: Cut your arrow “blank” a bit longer than you think you need, and gently sand away any side shoots, buds and other imperfections. If you were harvesting to make good-quality arrows in your shop, you might choose to skip this step and leave the bark on (branches) because for that, you need to season the wood slowly, and bark helps slow that process. However, bark can be very hard to remove when dry/seasoned. In a quick survival situation, just remove the bark and shape it for immediate use. Try to “round” every edge, and sand smooth if needed. Gritty sandstone is fine at this stage, as you will be “burnishing” or otherwise sealing it later. Remember that sharp edges and rough spots cause breaking points, so if there are some of those which you think might cause the arrow to shatter with pressure, then discard it. Remember, though, while sanding that every micro-filament you remove reduces its weight/strength, so true weight cannot be tested until burnished or otherwise smoothed/oiled.
- Straighten the Wood: If not very straight (as usual) then bend them to uncurve them if possible. A heat source is usually necessary to get them perfectly straight, although in a survival situation, you do what you can, like perhaps putting the bent areas under your arm before trying to straighten. When heating, take care not to burn them: just make them warm enough to bend easily, and then hold them straight until cool. Candle heat, or a couple of coals separated from your fire, is often best. Repeat as necessary, and if you have time to wait before use, bundle and tie all your shafts together so they use mutual strength to stay straight. If seasoning for future use, you can even bundle them together with a piece of metal or other stiff item. Once seasoned (so no longer easily bendable) you will probably need to straighten them more by steaming curves over boiling water (teapots are great) then holding straight until they cool. If you have an extremely flat surface, or two boards between which you can place your heated/steamed arrow blank, that can sometimes be helpful in the straightening process.
- Cut Nock for Bow String: Use a little file, very sharp rock, or other useful tool except probably not your knife since it’s the wrong tool for this job and usually results in getting cut, then wrap it just below the end with sinew, thread, or other thin material so the shaft doesn’t split when you shoot it. You can also try wrapping the wood first if all you have is a knife and are worried about splitting the arrow (and your fingers) when carving the nock. Now for a guest video from Dave Canterbury:
- Seal the Arrows: Burnish the shaft with smooth rock, and if you have some lindseed oil, tongue oil, bee’s wax or a favorite finishing fat, then apply a bit of that. If you have an oily face or even sweat, that can work if careful to not make the arrow too wet.
- Fletch the Arrows. Well, that would be a whole ‘nother blog post to do this right, but in a survival situation, you can find pieces of plastic discarded in the woods, or look along waterways for fowl feathers. As I show in my video at the top of this post, stick your knife in a piece of wood, and split the shaft of the feather backwards against the blade. Use a pitch stick to “glue” at least one feather onto the thinner/narrower/lighter side of your arrow, and tie the ends with some kind of makeshift thread, like from a fraying backpack strap. Same with a piece of plastic, assuming you can find and cut something to shape that’s isn’t too stiff or too floppy. If you want to learn how to fletch arrows well, start by watching the following guest video:
- Shape Arrowheads: Now this is a real lifelong pursuit. If you want to learn from the best, go to a “primitive skills gathering” such as the Glass Buttes Knap-In and jointhe email list of Puget Sound Knappers and if you are in Washington State, visit their weekly complimentary knap-ins for free instruction and materials by donation! In a survival situation, you will need to find some broken glass and figure out how to “knap” it – glass is what many people learn to knap in the first place – or find some natural slate (layered rock) and other rock like standstone to grind it into shape. That’s exactly what indigenous people in the San Juan Islands area of Washington State used to do, according what a cultural resource specialist from the Salish Tribe told me many years ago. To practice making arrowheads with slate, buy a piece at your local big-box lumber/hardware store (outdoor patio rock section) and get some sandpaper and files, leather gloves and eye protection goggles, then smash the slate and start filing/sanding it into arrowheads.
- Size Arrow Tips & Attach Arrowheads: Similar to what you did with the string nock on the back of the arrow, you might want to sand/carve/file the front of the arrow into a thick “duck-bill” shape for arodynamic travel, and you can try to use it that way if the front of the arrow is significantly heavier than the back. If the arrow is balanced, or lighter in the front, you absolutely need an arrowhead to make the front heavier. In a survival situation, there are two options for attaching the arrowhead: either a) carve one side of the arrow and lay your arrowhead against it so it comes as close to center as possible – but that’s hard to attach; or b) make a split in your arrow (wait for instructions) and insert the arrowhead (if thin enough at base) between the two pieces: if you do the latter, first wrap your arrow an inch back from the tip with some thread (sinew would be preferred for everything arrow-related) and then create the split and if you can go the distance without cutting yourself and your arrow is thick enough, carve material out to fit your arrowhead. Wrap it as needed to secure, and as an added measure, use pitch again: see http://www.pugetsoundknappers.com/how_to/pine_pitch_glue.html by Jim Keffer to go all natural.
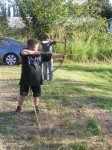
- Shoot Arrows instinctually because in a survival situation, your bow and arrows are not going to be perfectly aligned and sighted. In other words, don’t take time to aim. Just lift your bow simultaneous to pulling the string back, fire, and freeze: just like the videos below demonstrate. Again, be sure to never “dry” fire the bow (dry firing is when the string is pulled back and let go without an arrow) because you will probably shatter your bow.
Chris Chisholm is founder and co-owner of Wolf Camp and the Conservation College. Interesting guest video follows:


