January 21, 2012
It was an overcast, cool morning when we met up at the Earth Lodge. Rain was forecast for the afternoon and we were hopeful that our shelters would be complete before it began. Bibiana and her family decided they would like a lean-to built near their earth lodge – a place where family and guests could rest and warm up by the fire while working. We checked out several locations as a group, discussing the pros and cons of each spot, and finally settled on an area nestled nearby among the Douglas firs.
Building the lean-to near the Earth Lodge.
Chris taught us how to decide the best placement based upon the terrain, prevailing weather and area safety (considering the 5 W’s: wood, wind/weather, water, wigglies and widow-makers). The family had some materials (cedar landscape posts, rocks, cedar bark) available for us to use so we began by measuring to determine the size shelter to build. Then we used a post-hole digger to make holes for the side beams. Brace beams were lashed on and the top support beam was added and lashed into place. In the meantime, Chris explained that heat could be reflected from a fire to warm those in the shelter. We discussed placement of the fire and reflection wall in terms of safety during both winter and summer (when nearby ground and trees would become a fire hazard) and we decided on a location to dig a pit and build a small wall.
Rocks were moved from around the yard and formed into a reflection wall behind the fire pit we dug. We added soil to the wall to help cement the rocks together and close any gaps.
Once the supports were lashed together on the lean-to, we added more beams to the back then covered it (back and sides) with cedar bark. We carried in douglas fir boughs for the floor (they are so comfortable to sit on and they smell wonderful).
The lean-to is angled so people can sit comfortably inside out of the weather. We have added other large branches for additional support and are placing cedar bark like shingles on the back and sides to make it weatherproof.
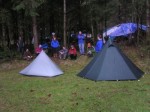
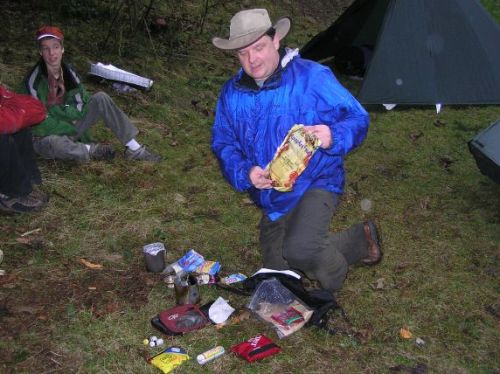
We took a break from our lean-to project to watch a special talk on ultralight travel given by our friend, Tim Kropf. He did an amazing job covering the main aspects of going ultralight. He set up some shelters (in the rain, it was raining by then) for us to check out and showed us his special, lightweight packs (and how to pack them!) and all of his gear. I’ve (this is Kim writing) been hiking and bushwhacking around the Pacific Northwest for years now and I was amazed at all of the tips and tricks he had to lighten one’s load. I think my favorite tip was to replace the padding inside the backpack straps with socks! Oh, and the stove he uses… It was a truly inspiring presentation and we were all thankful that he shared it with us (and gave us all a pack list!).
These are two ultralight shelters we learned about during Tim’s awesome presentation!
Tim pulled everything out of his pack so we could see examples of all of the little changes one can make to lighten the load. Truly inspiring.
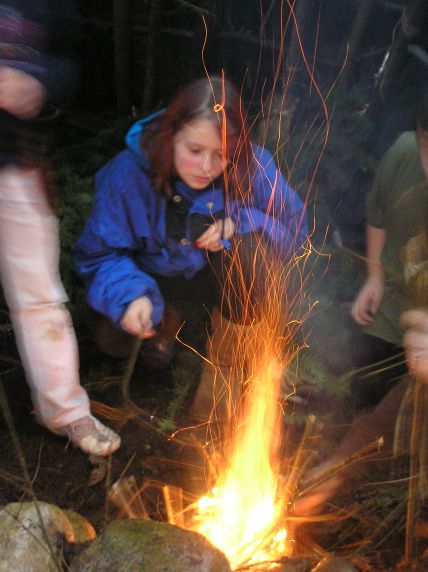
Then it was back over to the lean-to for our next lesson: fire by friction! Chris showed us how to create fire using a bow-drill. We all stood back and watched as a tiny coal formed in the dust from the base board and spindle (both cedar) and chris placed it into his tinder bundle (cedar and cattail down). We gathered around as he blew it into flame then built up a nice little fire in the pit we had dug.
Skill and intention combined to make this another successful fire by friction demonstration.
A beautiful fire for a beautiful lean-to.
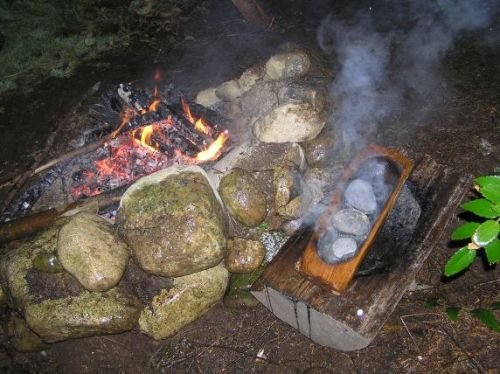
After a quick talk on the proper selection of rocks (if you choose poorly, your rocks can explode in the fire and launch dangerous shards quite a distance), we placed several in the fire to heat for our next lesson: rock boiling. Rock boiling is the method by which you can boil water (to kill things like giardia) in a wooden bowl (you had to make/burn out because you forgot your metal pot) without catching your bowl on fire. It really does work and we had a brave volunteer taste-tester who said the water didn’t taste too bad (though it was a little ashy).
Chris is moving the red-hot rocks from the fire to the burn bowl with some improvised tongs.
Rock boiling really does work. It takes practice and is an important survival skill. Notice the smaller burn bowl is resting on an even larger burn bowl.
We also spent some time out in the woods near the house and learned how to build a debris hut. I think the most important lesson learned is that it takes a long time to build one so if you think you’re going to need it, start early, be efficient and work hard! We utilized our knowledge of the 5 W’s to help us select a site then began collecting materials from the surrounding area. While some people worked on the frame, others collected debris (leaves, dead fern fronds and downed Douglas fir boughs) for the inside. This is, after all, nature’s sleeping bag so the contents of the hut must be stuffed (= totally packed in tight) in order to keep you as warm as possible all night. It’s important to build your shelter in a safe location that is near your building materials. It wastes too much time and energy those two things aren’t close together. Efficiency, efficiency, efficiency. Try to build one and you’ll see what I mean! When doing demonstrations we try to mostly use only downed material but in a real survival situation, use whatever you can get your hands on. However we did use some vine maple branches to lash together the frame.
The spine and ribs used to form the debris hut along with some debris on the inside.
When you’re all done it should take you at least 10 minutes to wriggle in (because it’s so tightly packed with material) feet first. Make sure to leave some extra debris within arms reach that you can draw in toward you to form a door. And, depending upon where you are and the temperature and weather, you will need 1-3 feet of additional debris on top of your shelter to increase your warmth or weather proof (bark can also be used if placed like shingles, and if you can find enough of it). One that’s done, and before you climb in for the night, pile heavy branches on top so your shelter doesn’t come apart if you wiggle around in the night. And remember, it may not be comfortable but you’ll survive the night.
Trying our debris hut on for size. Notice all of the leaves underneath. It’s vitally important to have a good barrier between you and the ground.
We ended this great day with a beautiful meal of Elk Stew provided by Bibiana, Darkfeather and Lisa from meat the Joe had hunted. Can’t wait for this spring when we have a work party to work on the Earth Lodge, and then next February when we do this “shelter workshop” starting in the luxury of the finished lodge!


