Basketry is a fascinating and ancient traditional craft that dates back to the earliest humans. Our ancestors created and developed the basket as a method for transporting food, water, children, and other materials. I love the history behind basket making — it’s kind of like the invention of the wheel. Our ancestors figured out how to use the natural materials of their environment to create a system for transporting the ‘stuff’ that was essential for their survival.
Without a doubt, these first baskets were simple and without frills. However, over time, the tradition of basketry has created a variety of different styles, concepts, designs, and uses. Some basket designs are passed down through a singular culture or tribe, while other baskets trace their ancestry around the world. While the origin of basketry is based in functionality, it has developed into an art of its own, woven with the histories and traditions of cultures around the world.
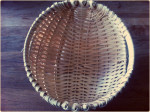
North America has a rich history with basketry, as we have the basketry traditions of Native Americans, First Nations/Aboriginals, the pilgrims, the Shakers, the Quakers, the Amish, and many other ‘home grown’ traditions such as the baskets from Appalachia and much more. One of my personal favorite baskets is from the Appalachian basketry tradition: the Potato basket. The potato basket is a 3 point lashing variation of the traditional 4 point lashing flat-bottomed egg basket of Appalachia. A 4 point lashing creates the traditional ‘diamond’ shape around the ribs or handle of a basket. A 3 point lashing creates an ‘X’ shape. It also creates a firm foundation for the basket — the pockets created by the lashing will securely hold the ribs in place until they are woven.
One of my most favorite basketry books, Splint Woven Basketry, describes the potato basket of Appalachia as a ‘direct descendant of the willow field baskets of England, Scotland, and Wales.’ It is a sturdy basket that was designed to be lugged through the field and hold up under heavy loads, while being comfortable enough to be carried close to the chest. The two handles make it an ideal basket for carrying, and the reinforced ribs help it withstand stress. The Appalachian potato basket is also visually appealing, and can be used as a ‘functional’ and beautiful decoration.
Supplies you will need:
- One 10″ hoop (rim)
- 1/4″ flat reed (min. 48 yards)
- #6 or #8 round reed (ribs) (min. 12 yards)
- Waxed thread/ artificial sinew (min. 60″)
- Basket shears
- Sharp knife
- tape measure
- Bucket for soaking flat reed
- Clothes pins (recommended)
- Pencil
- Awl, ice pick, or small screwdriver (sharp)
You can find all these supplies at the Basket Makers Catalog. I highly recommend purchasing basketry materials from them! They are a basketry and chair caning company from Kentucky that source their products ethically. They offer competitive prices, a huge inventory, instructions/tips and other forms of helpful information on their website. They’re super friendly and I support their business!
Instructions for making an Appalachian Potato Basket:
First, we will measure and mark the hoop. This will help us figure out where to place the ribs.
Measure the circumference of the hoop with the tape measure, and divide the circumference in half, and make a pencil mark at the halfway points. For you ‘non-math’ people like myself, just try to eyeball exactly halfway and mark the halfway points. Good enough!
Now, we will cut the first 3 primary ribs. The primary ribs are the ‘backbone’ of the basket. Taking your round reed, cut 3 ribs, each 20″ long. Next, we will notch the ribs on both ends. Be sure to notice the natural curve of the rib! The notches need to be cut on the outside of the curve. To make the notch, measure 1/4″ away from the end of the rib. This will be the end of the notch. Cut the notch 1/4″ away from from the end of the rib, at about half the thickness of the rib, and carefully scrape out an area the length of the hoop rim being very careful not to cut off the 1/4″ rib end. Repeat the notching until all 3 ribs have notches on both ends.
Next, we will secure the notched primary ribs to the hoop. Personally, I find this the most difficult part of the basket, as you will need to secure the ribs to the hoop while tying the sinew. I found that it is helpful to hold the basket againt your legs and table for this step, so that the ribs don’t pop out. After this step, it is smooth sailing. To secure the ribs, locate your pencil marks on the hoop. Fit the a notched rib on the inside of the hoop with one end on one mark and the other end on the direct opposite mark. Tie securely with the waxed thread on both ends (try to tie with an ‘x’ shape to really secure it). Now you have your middle rib in place. Next, take the tape measure and measure and mark 1″ to the right and 1″ to the left on both sides. This will be your placement for your next 2 ribs. Place and tie the two ribs just like the first one. It is very important to tie the ribs securely, otherwise they could slip and get wonky! Trim the ends of the waxed string if necessary.

Now we get to start weaving. To start, we need to make an ‘ear.’ Take your bucket and fill it with water (enough to submerged coiled flat reed weavers in).
Take 2 weavers (your flat reed), each at least 8 ft long, and coil them separately. Submerge them in the bucket for about 1-2 minutes — don’t leave any reed in the bucket for longer than 5 minutes.
Take a wet weaver and begin to weave the ear. To weave the ear, we will weave around the 3 primary ribs and the hoop on both sides of the ribs. To begin, we will start on the right side and weave our way over to the left.
Starting on the inner right side, loop over the hoop and make X’s on top of the 3 primary ribs. See my interestingly-drawn diagram for help and follow along with the numbers. Your starting position is ‘1’ and you will end at position ’20.’ Be sure that rib A has a wrap in front.

After making the X’s, you should be at position 20 according to the diagram. Now, take the same weaver and weave the ear by going around the rim, over C, under A, over B, and up and around the other rim. See the following diagram for help. Now we are weaving between the ribs. It is very important to remember that the area between the last rib and the rim must lay flat. You will have to give the weaver a ‘half twist’ to make it lay flat against the rim.

If your reed is feeling dry at any time, splash a little water on it. Don’t let your reed dry out.

Continue weaving the ear until you have gone around 6 times on both rims. Don’t cut your weaver when finished! Take the clothes pins and secure at the rim (keep the reed pinched against the rim so it can’t loosen). Now is a good time to take a little break and stretch your shoulders out!

Now, we will cut and insert the other primary ribs.
Cut and number the following ribs from your round reed:
* Note: it is very important to mark the measurement on the rib with a pencil!
Cut 2 (two) of each:
- I: 13 1/2 “
- II: 15 1/2 “
- III: 16 1/2 “
- IV: 17 1/2 “
After cutting these 8 ribs, gently sharpen the ends into points on both sides with a sharp knife. Do not take too much off the ends, as it will make your rib too short and you will have to cut a new one. The sharpened point will help the rib slide in to the pocket more easily.
Now, insert the I rib (13 1/2″) in the first opening in the pocket. It will be just beneath the hoop. Place one rib on each side. Wiggle it in deeply to make sure it is secure. Next, insert the II rib (15 1/2″) in the same opening as the I rib, but position below the I rib on both sides.
Now, insert the IV rib in the opening beside C on one side and B on the other side, if necessary using a tool to enlarge the space above a little bit.
Now we will need to drill a little hole for our III rib. Take your awl/ice pick/screwdriver and carefully split the reed between the II and IV ribs. This is the area of reed that is laying flat. If your reed isn’t laying flat, it will be very difficult to make a hole in it. Insert your III rib on both sides, wiggling it in to make sure it is secure.

Now, all 8 of the primary ribs should be added, and the basic skeleton of the basket should be in place. Gently adjust the ribs so they are spaced equally.
Next, we will measure the opening for the handle. With the tape measure, measure the distance from the edge of one ear to the edge of the other ear. Take your pencil and make a small mark on the halfway point.
For example, if the distance is 12″ you will make a mark at the 6″ point.
Next, from the center of the mark that you just made, measure 2″ to the right and make another small mark. Now measure 2″ to the left of the center and make a mark. Now we have marked off a 4″ opening that will become the handle. Repeat these steps on the other side. Now we should have 2 handle locations directly opposite from each other.
Now we get to weave the basket. Double check that all the ribs are in place securely, also check if your reed needs to be sprayed with some water. We will begin weaving using the remainder of the weaver with which we weaved the ear.
Weave under one rib, over the next etc. Be sure to go around the rim and reverse the process so that the rows are alternating. Weave 5 rows on one side of the basket and secure with a clothes pin. Now weave 5 rows on the other side of the basket and secure with a clothes pin. Stop and now we will cut our secondary ribs.
We will cut and insert secondary ribs to provide more support for the basket.
Cut the following secondary ribs and taper them on the ends:
Cut 2 (two) of each:
- I: 14″
- II: 16″
- III: 16 1/2″
- IV: 17″
* Note: the secondary rims do not go all the way into the ear. They only go into the 5 rows of weaving with their points hidden under at least 2 weavers.
Place secondary rib I in the same space as primary rib I. All secondary ribs must be placed on the underside of the primary ribs (i.e, before the primary rib). Place secondary rib II in the same space as primary rib II. Do the same for secondary ribs III and IV. Note that the primary ribs A, B, and C do not get secondary ribs.

Once the secondary ribs are in place and secure (won’t fall out), begin weaving again over one rib, under one rib, just like before. It is okay if your alternating pattern is disturbed for the first row. The second row will correct itself if you always weave ‘over one, under one.’
Next, we will learn how to splice. Splicing occurs when we need to join in a new weaver.
When there is 2-3 inches of weaver left, join in the new soaked weaver (remember, all weaving reed needs to be re-hydrated before we can weave with it). Note that the splice should never take place at the rim, so if necessary backtrack.
Take your new weaver and knife and carve the end into a soft arrow point (not too pointy) — this will help us to hide the end and create a clean looking join. Now, overlap the new weaver on top of the old one, and weave with both weavers for 3 or 4 ribs to secure. Now tuck the ends under a rib.

Continue to weave the basket. As we weave, we need to alternate which sides we weave on so that the basket will be balanced. To do this, weave several rows on one side, and then switch to the other side for several rows. You should never weave on entirely one side.
Remember, we need to leave our openings for our handles. When the weaver reaches the 4″ mark you already made, on each side, the I rib will become the new point at which you turn and go back down, rather than weaving around the hoop. This will leave a space between the first rib and hoop, which will be your handle.
Do not pull tightly on the weaver! This will cause the basket to warp, and you will have lopsided handles.
Now we need to weave in ‘fillers.’ It should’ve become apparent that the weavers are closing in on the rim and base much faster than on either side. To remedy this, we must use ‘fillers’ to fill the gaps so that our basket doesn’t have gaping holes.
The I rib will ‘fill in’ (become too crowded) before the bottom of the basket does. To weave in the fillers, we will simply drop down to the next rib, turn, and weave back exactly like we turn the hoop. Weave to the rib on the other side and repeat until the space is filled in, alternating which side of the basket you weave on. If a rib fills up, you can drop back to the next rib. Be sure that all the weavers are snug and there is no extra space.
Continue weaving until the bottom is filled in. I like to insert my fingers between the ribs and give the weaver a gentle push to try to expose more rib and pack down/ tighten up the weavers. Don’t pull tightly on your weaver, though! We don’t want to warp the basket.
Once the basket is woven, tuck and hide the ends.
Now we will wrap the handles. This will give the basket a polished look.
Take a short (soaked) weaver and insert it into the weaving behind the rim. Wrap in a continuous, secure motion until the handle area is covered. Now, cut the weaver leaving a 1″ tail. Notch the end into an arrow shape, and insert this end into the weaving on the back of the rim on the opposite side. Your wrapped weaver should be tucked on the back of the rim, with the ends not visible on the front. Repeat on the other side.

Take your shears and carefully clip off any stray ‘hairs.’
Now, clip off the extra bit of rib sticking up from ribs A, B, C, but leave about 1/4″ sticking up over the rim, to make sure they aren’t cut too short.
Congratulations, you just made your first Appalachian Potato Basket!

If you are interested, here are some basketry resources I recommend:
- Splint Woven Basketry by Robin Taylor Daugherty
- Earth Basketry by Osma Gallinger Tod
- Donna Sakamoto’s work and her blog (take a class from her if you have the chance!)
- Natural Baskets by Maryanne Gillooly (good resource for natural materials)
- NativeTech’s Basketry — basically a primer for understanding / identifying Native American baskets. Beautiful photos and great information
If you have any questions or comments, please let us know!

Hannah completed our Outdoor Skills Apprenticeship in in 2013 and graduated as a lead herbal instructor in 2014. She is an aspiring basket weaver. Hannah graduated from the University of Oregon in 2014 with a Bachelor’s Degree in Foreign Languages. She has her own blog, where she writes about her love for crafts, animals, plants, cooking, and the outdoors: rainmountaincrafts.com
For In-Depth Learning, Join Our Weekly Online Classes:
- Tuesday Classes focus on Herbal Medicine & Plant Crafts in the autumn season, followed by Gardening & Cooking Wild Edible Food Plants in the spring.
- Thursday Classes focus on Wilderness Survival & Bushcraft Skills in the Autumn Season, followed by Wildlife Tracking & Birding in the spring.
- Saturday Classes for all ages guide you through the Wolf Journey Earth Conservation Course – Book One: The Neighborhood Naturalist.


